Remote Scenario
The remote scenario is the interface by which teams will capture the Compromise Machine and Backdoored Design flags. To capture the Backdoored Design flag, you will need the following target file:
This is the file your team will need to make the PLM receive for this flag
Scenario Flow
It’s important to understand the flow of events needed to complete the remote scenario. Understanding general eCTF API terms is a prerequisite for interacting with the remote scenario. Through the following procedure, you will connect remotely to a target team’s Photolithography Machine (PLM) via the Transfer Interface. You will not have direct access to the PLM’s management interface, nor will you receive the debug/error output that comes out of it.
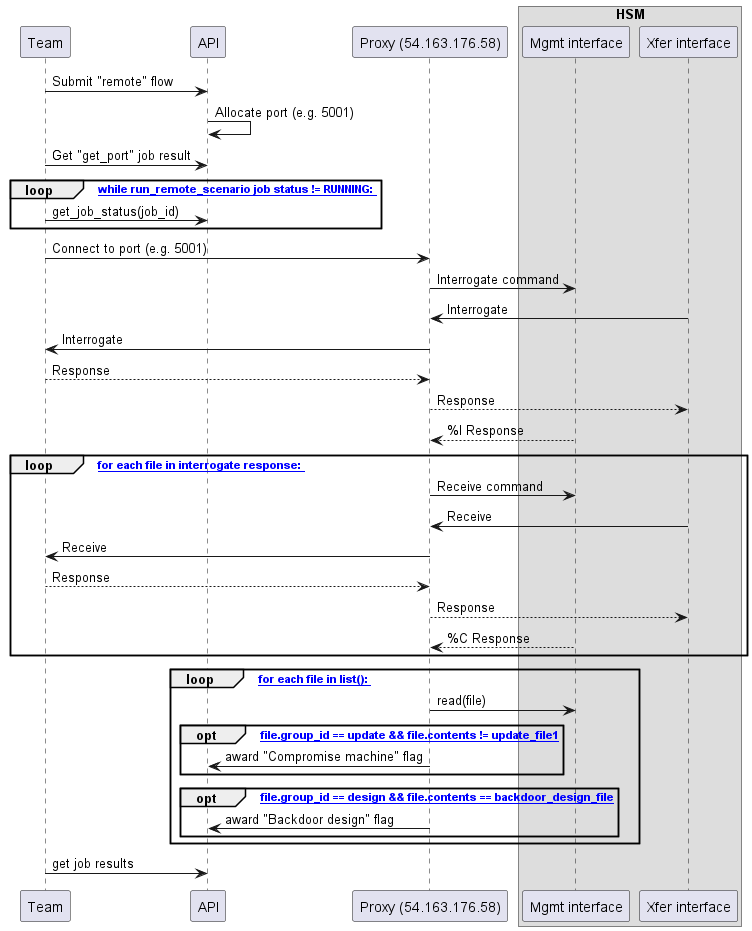
Your client will submit the
remoteflow to the API, for example, by running theuvx ectf api remote connectcommand. This flow will have two jobs:get_portandrun_remote_scenarioYour client will then wait until the
get_portjob completes. The result of this job is the TCP port your client will connect to on the Forwarder host (IP: 54.163.176.58).Once a port is claimed for your session, your client will wait for the
run_remote_scenariojob to begin.When that job’s status is
RUNNING, your client will attempt to connect to the provisioned port. This may take a few seconds while the devices are being flashed.As soon as the port is available, a timer starts. After 120 seconds, the scenario will end and the port will be disconnected. Your exploit must complete in 120 seconds, which includes the significant overhead compared to normal inter-HSM communication due to the fact that the serial data is being forwarded over the Internet.
After the connection is established, this TCP port will act as a direct pipe to the PLM’s transfer interface. Any data the PLM sends, you can receive on this port, and any data you want to send to the PLM, you should send to this port.
The eCTF infrastructure will issue an
interrogatecommand to the PLM HSM.For every file in the list returned to this command, the eCTF infrastructure will issue a
receivecommand from the returned slot to the same slot on the PLM.When the last
receiveconcludes, the TCP port will be closed.The eCTF infrastructure will then
listandreadfiles to check for two win conditions, one for each flag.
If the file belongs to the
updategroup and the file contents do not equal theupdate_fileprovisioned onto the technician HSM, you will be awarded the Compromise Machine flag.If the file belongs to the
designgroup and the file contents equal the backdoored_design_file exactly, you will be awarded the Backdoored Design flag.
You should then query the
run_remote_scenariojob results to get the flag. If the job has output, the results zip file will contain one or both flags depending on the outcome.
HSMError s from the PLM’s management interface will be handled in the following
ways:
Errors on
interrogate: The scenario will end. No flags will be awarded.Errors on
receive: The erroring file will not be received. Subsequentreceivecommands will still be issued.Errors on
list: The scenario will end. No flags will be awarded.Errors on
read: The erroring file will not be read. Subsequentreadcommands will still be issued and may award flags if successful.
Client
To connect the remote Transfer Interface to your local physical HSM, you will need to provide access your device’s Transfer Interface. This can be done with the UART adapter built into the provided XDS110-ETP-EVM. You will need to make the following connections:
XDS110 Pin |
MSPM0-LITO Pin |
|---|---|
GND |
GND |
TXD |
PA9 |
RXD |
PA8 |
You’ll then need a second XDS110-ETP-EVM board to connect to the debug interface and expose the Management Interface. The connections should look like this:
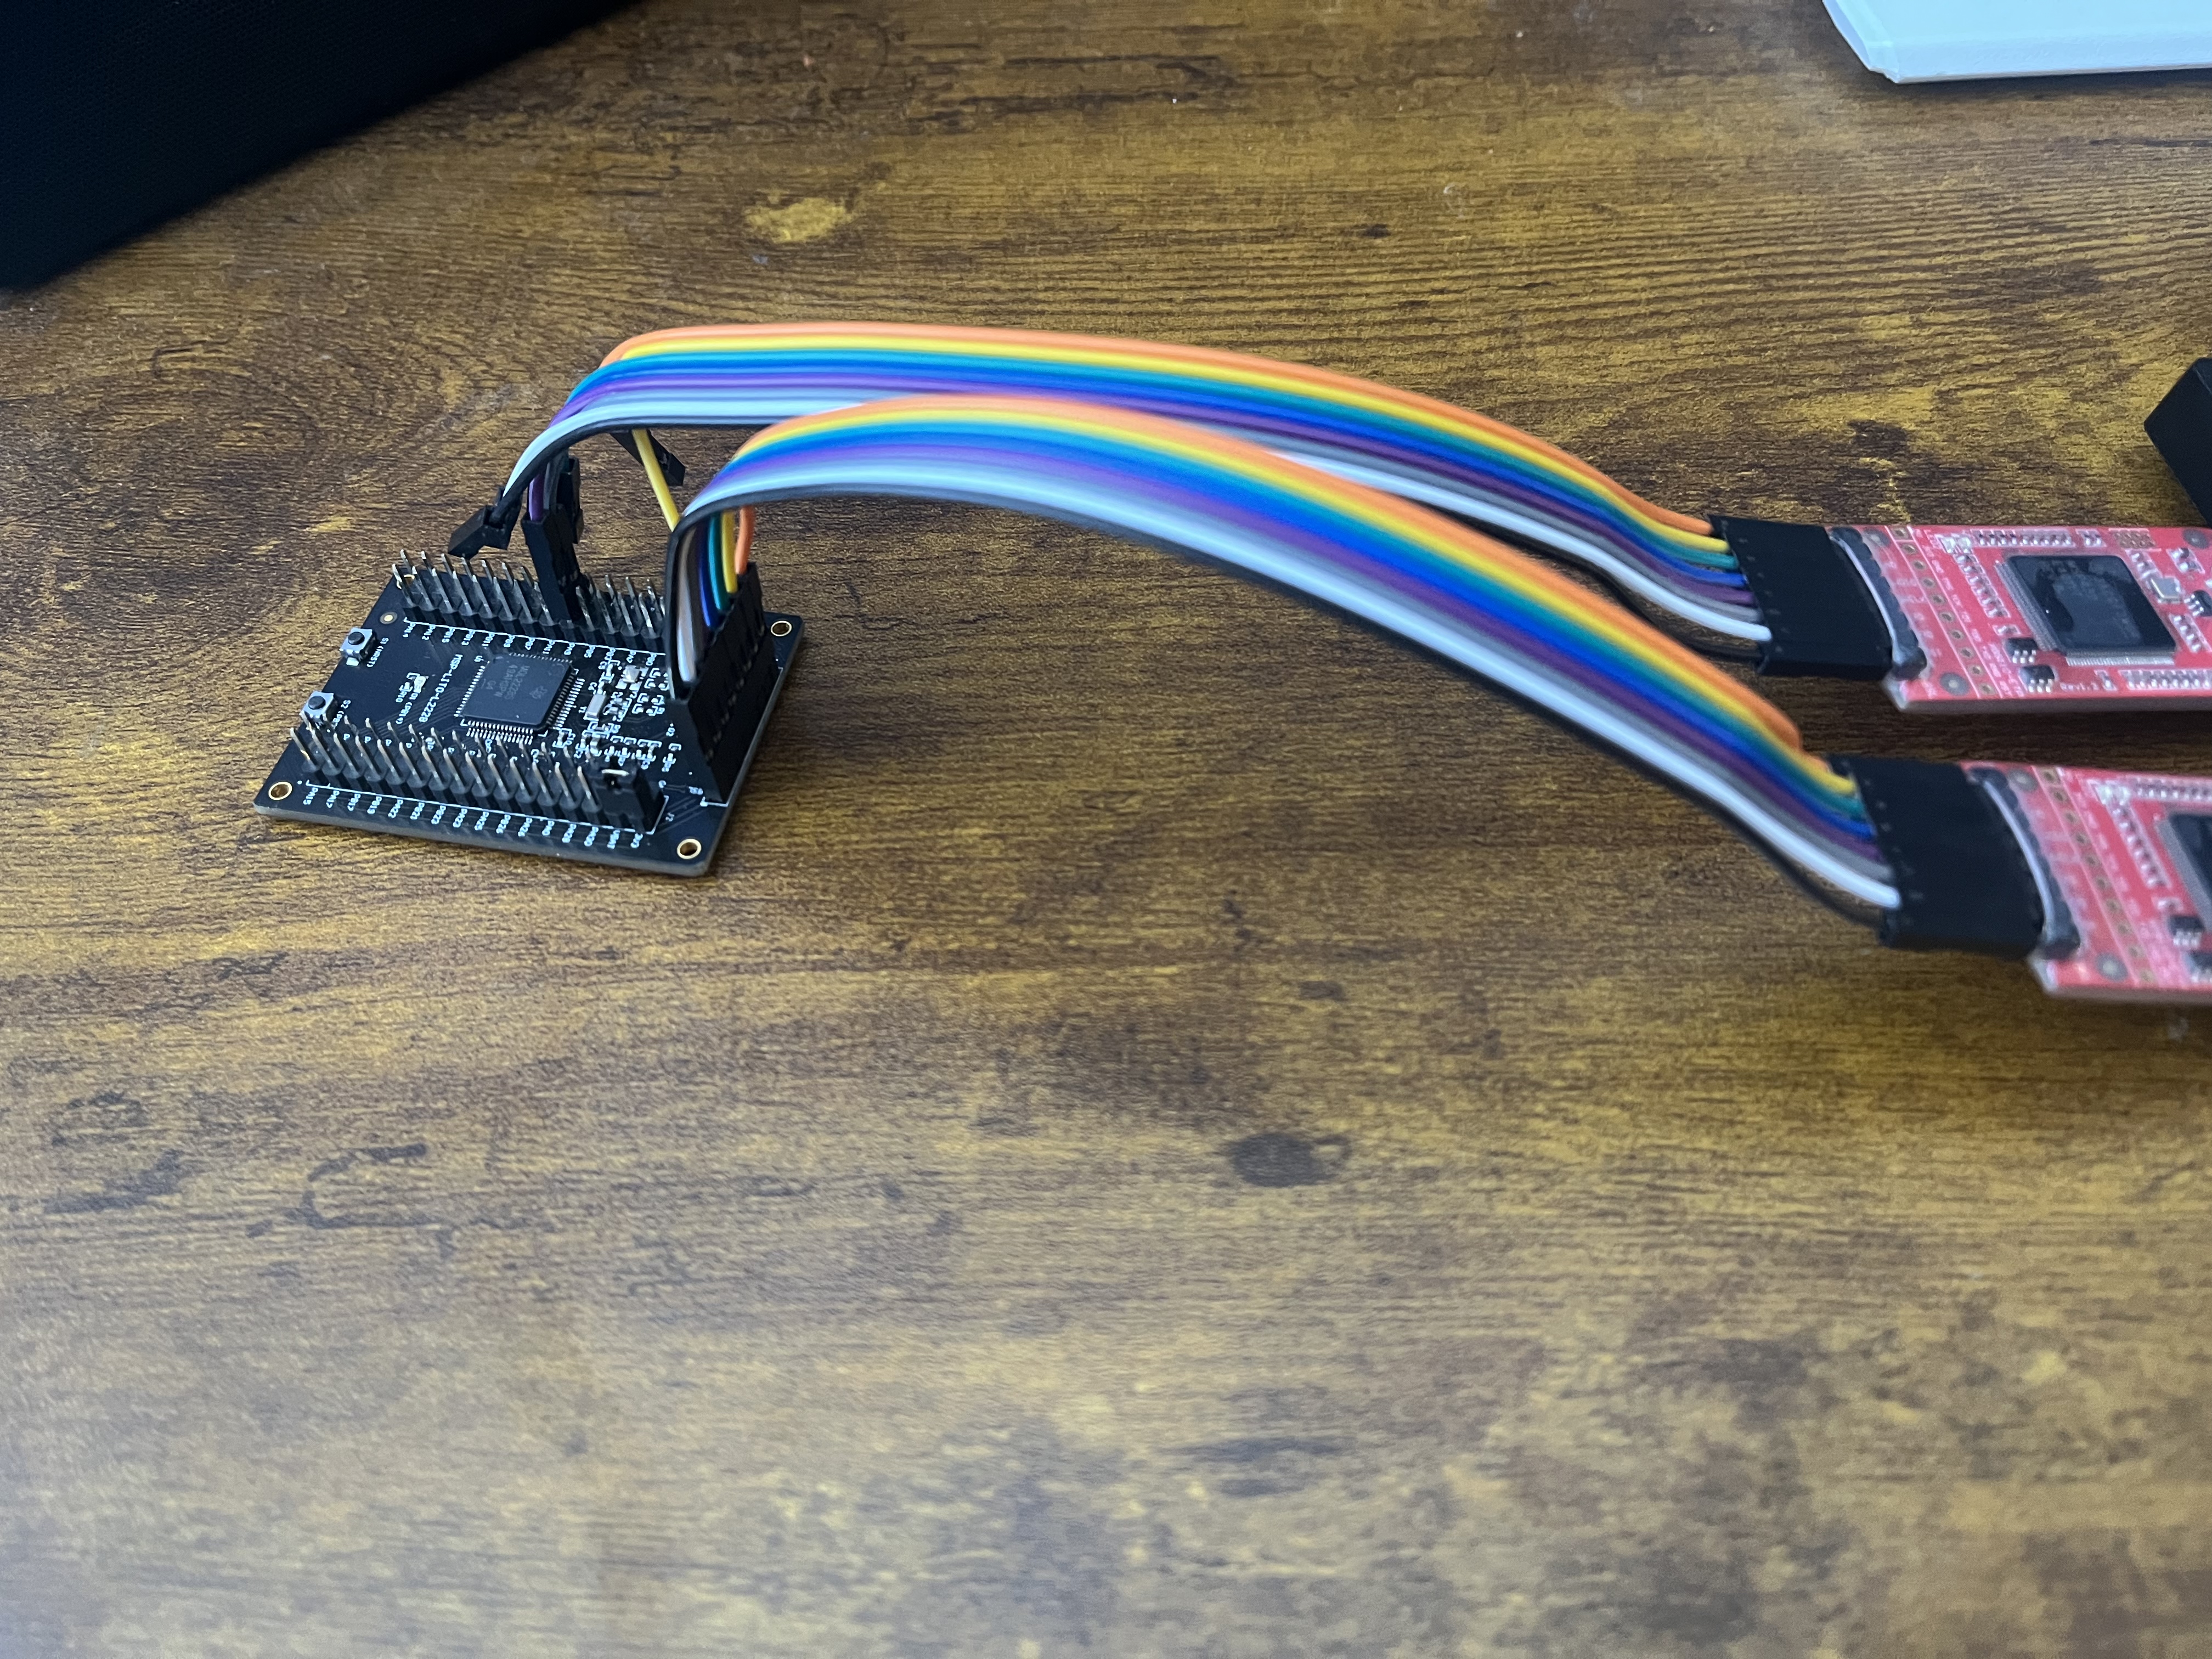
Both of these serial devices will then be provided to the client via the CLI:
$ uvx ectf api remote connect --help

 Usage: ectf api remote connect [OPTIONS] MANAGEMENT_PORT TRANSFER_PORT TEAM

 Run the full remote scenario


╭─ Arguments ──────────────────────────────────────────────────────────────────────────────────────────────────────────────╮
│ *    management_port      TEXT  Serial port for HSM management interface [default: None] [required]                      │
│ *    transfer_port        TEXT  Serial port for Transfer Interface UART [default: None] [required]                       │
│ *    team                 TEXT  Target team identifier for remote scenario [default: None] [required]                    │
╰──────────────────────────────────────────────────────────────────────────────────────────────────────────────────────────╯
╭─ Options ────────────────────────────────────────────────────────────────────────────────────────────────────────────────╮
│ --timeout  -t      FLOAT  How long (in seconds) to keep issuing listen() / forwarding before exiting. [default: 120.0]   │
│ --verbose  -v             Verbose output for debugging                                                                   │
│ --help                    Show this message and exit.                                                                    │
╰──────────────────────────────────────────────────────────────────────────────────────────────────────────────────────────╯
Sample output:
> uvx ectf api remote connect COM10 COM12 mitre
Submitting remote flow for team: mitre
Submitted remote flow with ID: xxxxxxxx-xxxx-xxxx-xxxx-xxxxxxxxxxxx
Waiting for get_ports to succeed and run_remote_scenario to enter running state...
get_ports=QUEUED  run_remote_scenario=QUEUED
get_ports=SUCCEEDED  run_remote_scenario=QUEUED
Remote TCP port: 5013
get_ports=SUCCEEDED  run_remote_scenario=RUNNING
Connecting to remote TCP: 54.163.176.58:5013.
..........TCP connected; starting UART<->TCP forwarding
Got DEBUG message: b'Ready\n'
Got DEBUG message: b'Ready\n'
Remote end disconnected. Scenario complete.
Customizing for Attacks
The provided client is only designed to work under nominal interactions between two HSMs in the same deployment. For your attacks, you may need to modify it to fit your needs. The provided TCP port is a direct tunnel to the transfer interface of the PLM, so you can connect a python script, a device running a modified firmware image, the Technician or Engineer HSMs, or any other mechanism you need to pull off your attacks to it. Implementing the plumbing to connect things other than serial devices to the transfer TCP port is up to you.
Note
It is highly recommended that you first debug nontrivial exploits locally using an unencrypted build of the PLM on the design phase boards before attacking the PLM using the remote scenario. You will save yourself lots of time on test iterations if you spend the upfront time to replicate the scenario locally.
